

Last Updated:
Are you preparing to test your prototype with participants who use screen readers? If so, building your prototype in code is best. CodePen is a tool that allows you or your Front End Engineer to mock up your prototype in code so that you can get feedback from users who use assistive technology.
Before you begin
This document assumes a basic knowledge of CodePen and how it works. If you’re brand new to CodePen, you may find these Google search results helpful.
Getting set up with CodePen
-
You’ll need to create an account. Your username will be visible in your URLs, so pick something you won’t mind stakeholders or research participants seeing
-
If you can get a paid account, it’s worth it for the ability to use debug mode, which:
-
removes ads
-
takes the prototype out of an iFrame
-
removes extraneous UI that isn’t relevant to your prototype
-
Multiple-page prototypes
If your prototype has more than 1 page, which most will, you’ll have to create a separate pen for each page. This is similar to creating separate artboards in tools like Figma. It can be tedious to manage but makes for a smooth experience as people check out your work.
Once you have your first pen built, you can fork your pen to create the second, third, and so on. When you fork a pen, it creates a new pen and URL with the same code as your first one.
Keeping this in mind as you build your first pen is helpful, so you only carry over what you need.
Build a static HTML prototype for content testing
Why test content with AT users and people with disabilities
Testing content on its own can provide important insights and allow teams to quickly adjust before building more robust prototypes or engineering a new page. To learn more about content testing, read How to Test Content with Users.
AT users and people with disabilities rely on plain language and content structure to understand and navigate web pages:
-
People with cognitive disabilities have an easier time understanding concepts when they are presented in plain language: content chunked out by headings, short paragraphs, and bulleted lists.
-
AT users, especially screen reader and braille users, often navigate web pages by heading (rather than reading a page word by word), so proper heading structure is critical.
-
Consistent structure across pages helps AT users orient themselves and more easily navigate across a website or application.
How to create an accessible content testing prototype
-
Type up your content in Word or Google Docs.
-
Use built-in heading styles and bulleted or numbered lists
-
Use ENTER to create new paragraphs
-
-
Export to HTML
-
Google Docs: File > Download > Web page (.html, zipped)
-
Word: File > Save As > select “Web page (.htm)” under “File Format”
-
-
Open the HTML file. It should open in your browser.
-
Right click anywhere on the open page and select “View Page Source,” then copy the code
-
Open CodePen and log in.
-
Make an account if you don’t already have one:
-
You can use a free CodePen account.
-
A paid account gives you access to “debug mode,” which removes ads and extraneous UI.
-
Either option will work
-
-
Your username will be visible in your URLs, so pick something you won’t mind stakeholders or research participants seeing, such as your initials. You can change it later if desired.
-
-
Under the “Create” menu, select “Classic Pen.” This will create a new CodePen that we can share with participants.
-
When your new CodePen is open, do the following:
-
In the “HTML” section, paste in the code that you copied above
-
At the top of the page, select the pencil icon to edit the CodePen’s title. Give your CodePen the same title it would have in a browser’s tab bar (e.g., Choosing a Decision Review Option | Veterans Affairs).
-
-
Select the “Save” button to save your changes.
-
If you are using a free CodePen account and so don’t have access to “debug mode,” links external to CodePen don’t open properly in the CodePen window. You’ll need to update the links to open them in a new tab. Go to the “HTML” section of your CodePen and do the following:
-
In the code, look for anything that starts with
“<a href”. These are the links. -
Add
target="blank"after the<a href, and “(opens in new tab)” to the text of each link-
For example, change
<a href="https://va.gov">Go to VA.gov</a>to
<a href="https://va.gov" target="blank">Go to VA.gov (opens in new tab)</a>.
-
-
-
Test each link URL. Links created in Google Docs don’t always export correctly. If you need to, update the URL in the code. Look for the
hrefthat contains the incorrect URL, and then correct it. -
Select the icon to the right of the “Settings” button. This is the “Change view” menu.
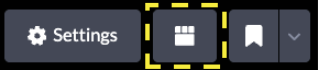
Select “Full page view”. This will open your prototype in a full page, without any visible code.
-
If you have a paid CodePen account, you can use “debug mode” instead, which removes the CodePen frame around the prototype.
-
-
Review your prototype on desktop and mobile. Ensure that the heading structure is correct, the lists are true lists, and the links work. If anything isn’t working, you can ask the ADE team for help with this step [link].
-
Copy the URL -- this is the public link to your prototype!
-
Long URLs can be frustrating for some participants. You can make things easier by:
-
Using a link shortener like http://bit.ly to shorten the URL
-
Emailing the link to the participant in advance
-
-
Build an interactive prototype
This method of building an interactive prototype has been less used recently because more teams have been using the new VA Prototype Kit or branching Production code to make a GitHub Codespace.
Start with HTML
-
You can create a new CodePen, or fork an existing one. I think it’s easier to create your own unless an existing pen has components you’ll definitely need.
-
Add any external style sheets in the CSS settings section (CodePen docs to add external sources). For VA.gov, two style sheets will be super helpful to have from the beginning:
-
VA.gov styles:
https://unpkg.com/@department-of-veterans-affairs/formation@7.0.4/dist/formation.min.cssas an external style sheet in the CSS section. -
Font Awesome styles, if you’ll use any icons in your prototype:
https://cdnjs.cloudflare.com/ajax/libs/font-awesome/6.2.1/css/all.min.css
-
Next, start building the first page of your prototype in the HTML section of the pen. When testing with folks using assistive technology, it’s important that your HTML is semantic and accessible so that you don’t introduce any issues that would not be present on the actual website.
-
If you are unfamiliar with semantic HTML, ask your team’s Front End Engineer to help you. It’s a fun thing to collaborate on together!
-
If you know how to read and identify semantic HTML, but aren’t comfortable writing it yourself, you may be able to use the developer tools in your browser to pull from the DOM on VA.gov, and/or Design System components to build your page. It’s important that you can identify whether aria attributes are present and correctly applied as you bring things over.
-
Your markup doesn’t need to be perfect, but it does need to be accessible. Otherwise, you might as well use an image-based prototype 😃
-
If your prototype has multiple pages, you may want to hold off on creating more pages until you add CSS, and any JavaScript you’ll need on other pages, to your first pen.
Optional: add CSS and JavaScript
You might not need additional CSS or JavaScript for your prototype. If not, skip this section.
If you need to add some polish to the presentation layer, you can add custom CSS in the CSS pane of CodePen. This will be included with any new pens you create by forking this pen.
That also applies to JavaScript. JavaScript will be necessary for interactions that don’t take the user to a new page, like triggering an alert after clicking on something. This may be another opportunity for collaboration with a Front End Engineer.
Linking more pages (which are separate pens)
Once you’ve got your first page done (or close to it), you can start creating separate pens for the separate pages of your prototype.
-
Fork the pen via the button on the bottom right portion of the CodePen UI. This will create an identical, new pen.
-
Name your new pen something that makes sense to your team, but doesn’t give clues or bias participants if you’ll be using it in a research study.
-
Update the HTML and any CSS or JavaScript as needed.
-
Change the pen view to Full Page View from the view menu, in the upper right part of the CodePen UI. Note the URL change.
-
Grab that URL, and use that for the
hrefvalue for any links in your first pen that need to point to this one. -
Repeat these steps for as many pages as you need.
Using CodePen prototypes in research sessions
Here are a few tips that will help a research session go more smoothly when using a CodePen prototype:
-
If possible, get a paid account and use debug mode, for the reasons mentioned above. Free accounts get limited debug mode use, but not enough use to be useful in a study.
-
Name all your pens something that makes sense to your team, but doesn’t give clues or bias participants. The prototype name displays on the screen if you’re not in debug mode (we’re not sure whether or not they’ll see it in debug mode).
-
Test your prototype with the assistive technology that your participants will use.
-
Screen readers
Learn more about screen readers and how to prepare your prototype for screen reader users.-
Issues during research sessions with a CodePen prototype
-
Since the “Full Page View” puts the prototype in a frame, it can be tricky for less experienced MacOS VoiceOver users to access. If they’re having issues, instruct them to:
-
Read item by item until they reach “[name of the page], frame” (i.e., if the page is named “My page,” they’ll hear “My page, frame”)
-
At this point, they should use this keystroke combination: VoiceOver modifier key + SHIFT + DOWN ARROW
-
That takes them into the frame, and they’ll be able to proceed as normal.
-
-
You can also guide them to dismiss the ad in the bottom center of the screen if it becomes distracting.
-
-
-
Alternative navigation
Coded prototypes can also be used to test with various alternative navigation tools. Learn more about alternative navigation tools and how to prepare your prototype for voice commands. -
If you’re unsure how to test your prototype with these tools, ask an accessibility specialist to help. Leave yourself enough time to fix any issues before your first research session.
-
-
Be sure the URLs across your docs are for Full View Mode, and not Edit Mode (read the Linking More Pages section below)
-
Be prepared to email participants the URL to the prototype. In our experience, blind and low-vision participants prefer to receive the link via email during the session. For research on VA.gov , our recruiting partner can send the link once the participant has joined the session.
-
Add a few helpful notes to your conversation guide:
-
If not in debug mode, give participants a heads-up that you’re using a tool for the prototype, and they should disregard the related UI. You want them to focus only on the content related to your study.
-
You can also guide them to dismiss the ad in the bottom center of the screen if it becomes distracting.
-
As with any other prototype, make sure you set the stage for people about what part of the website they’re entering, and what they may have done ahead of time. eg “imagine you are logged into the VA.gov website, and the information you see is your own.”
-
If you want to eliminate the “not their real data” factor from your research data, you could add a few minutes to your session to ask participants for relevant information, and populate the prototype accordingly before you start.
-
Help and feedback
-
Get help from the Platform Support Team in Slack.
-
Submit a feature idea to the Platform.