

Last Updated:
If you’d like to use a video clip of a research session in a presentation or report, you’ll first need to scrub the clip of PII and/or PHI (referred to as PII from here on). Removing a user's personal and/or health information is vital for anonymity and identity protection. You can find examples of PII here.
Before you begin
This technique uses a combination of iMovie, screenshots, photo editing software capable of blurring images, and the QuickTime Player app.
To scrub information displayed on a screen
If PII is displayed on a screen that the participant is sharing, follow these steps to scrub it out.
Step 1: Import and screenshot
Using iMovie, you’ll import the video and take screenshots following these steps:
-
Import the video file to iMovie.
-
Save this file before you do anything else!
-
Navigate to the section of the recording containing PII.
-
Mark the instances where the PII happens.
-
Pro-tip: each time the PII moves, add a new marker. This will help in Step 3: Import & Overlay.
-
-
Screenshot the area of the screen that contains PII.
-
Pro-tip: if there are multiple places where PII occurs, try to get all of them in the same screenshot. This will make aligning the screenshot with blurred PII and the video easier in later steps.
-
Step 2: Blur PII
Once you’ve got your screenshots, you’ll need to blur them in photo editing software.
-
Open the screenshot in a photo editing program (Photoshop, Preview, Pixelmator, etc.).
-
Isolate the PII using the selector.
-
Blur that PII real good.
-
Repeat steps 2 & 3 for all instances of PII on that page.
-
Export as PNG.
Step 3: Import and overlay
This is probably the most complex, tedious part of the process. You will get frustrated on your first try, but you'll be a pro after you've done it once.
-
Import the blurred screenshot to iMovie and align it with part of the clip you wish to cover. (This is where those markers you made in Step 1: Import and screenshot come in handy)
-
Choose "Picture in Picture".
-
Resize and align the screenshot.
-
You'll need to repeat steps 1, 2, & 3 every time the PII moves (e.g., if the user scrolled and it's higher on the screen). Copy & paste the screenshot already in iMovie and reposition as needed.
Step 4: Export and distribute
Pat yourself on the back—the hard part is over! Now, you need to get your PII-free user session out of iMovie.
-
iMovie File > Share > File
-
From this view, you'll be able to customize the export. Choosing a lower resolution and quality will help reduce file size, export, and upload time.
To scrub faces from video
During your research session, if the participant is sharing their screen and talking, their face will be displayed to the right of the screen. Since a person’s face is considered PII, you’ll need to scrub that out of the clip before it’s shared. Follow these steps to scrub the participant and researcher's face from your clip.
Step 1: Crop and record screen
Using the QuickTime Player app, you’ll crop out any speakers' faces on the screen following these steps:
-
Open the video you want to crop.
-
In QuickTime Player, go to File > New Screen Recording.
-
Select the Record Selected Portion icon from the toolbar at the bottom of your screen.

QuickTime Player toolbar with Record Selected Portion icon highlighted
-
You should now see crop bars that you can adjust to crop out faces and any other potential PII info, like open tabs.
-
Click the Options button to check your microphone settings and make sure you’re saving the recording where you want.
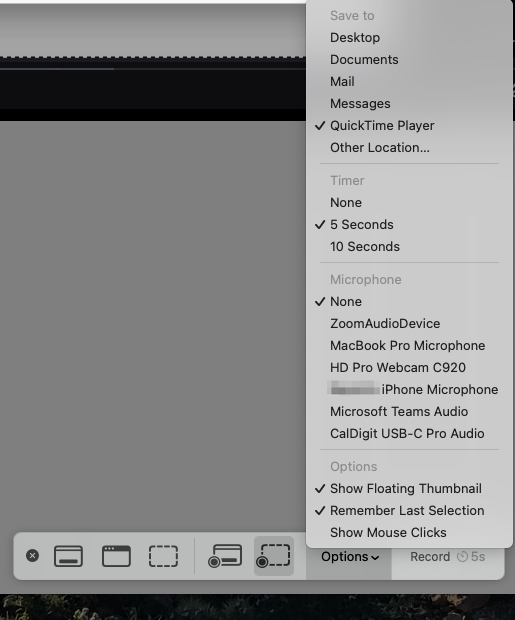
QuickTime Player options menu -
Next, click the record button on the toolbar (to the right of the Options menu). The countdown timer will start to give you time to hit play on your video.
-
To stop recording, click the Stop Recording button in the menu bar.

Step 2: Distribute
Once you stop recording, you should see your finished movie file in the location noted in the Options menu in the QuickTime Player app. You’re now ready to distribute your PII-free clip to the team!
Help and feedback
-
Get help from the Platform Support Team in Slack.
-
Submit a feature idea to the Platform.