

Last Updated:
If you need Perigean to take notes during a research session, this guide will help you prepare what you need before the session. Before you start, make sure that your conversation guide has been reviewed and approved.
Before you begin
Have your approved conversation guide open in GitHub. This will provide the framework for your notes.
Step-by-step guide
Step 1: Create a transcripts folder
Create a new folder called “Transcripts” in your research study folder.
-
Click Add new file
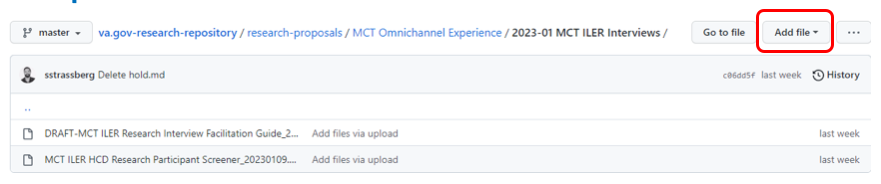
2. Click Create new file

3. Type “transcripts” where it says Name your file, then hit forward slash “/” to create the folder followed by the name of your file (e.g. MMDDYYYY_participant#.md)

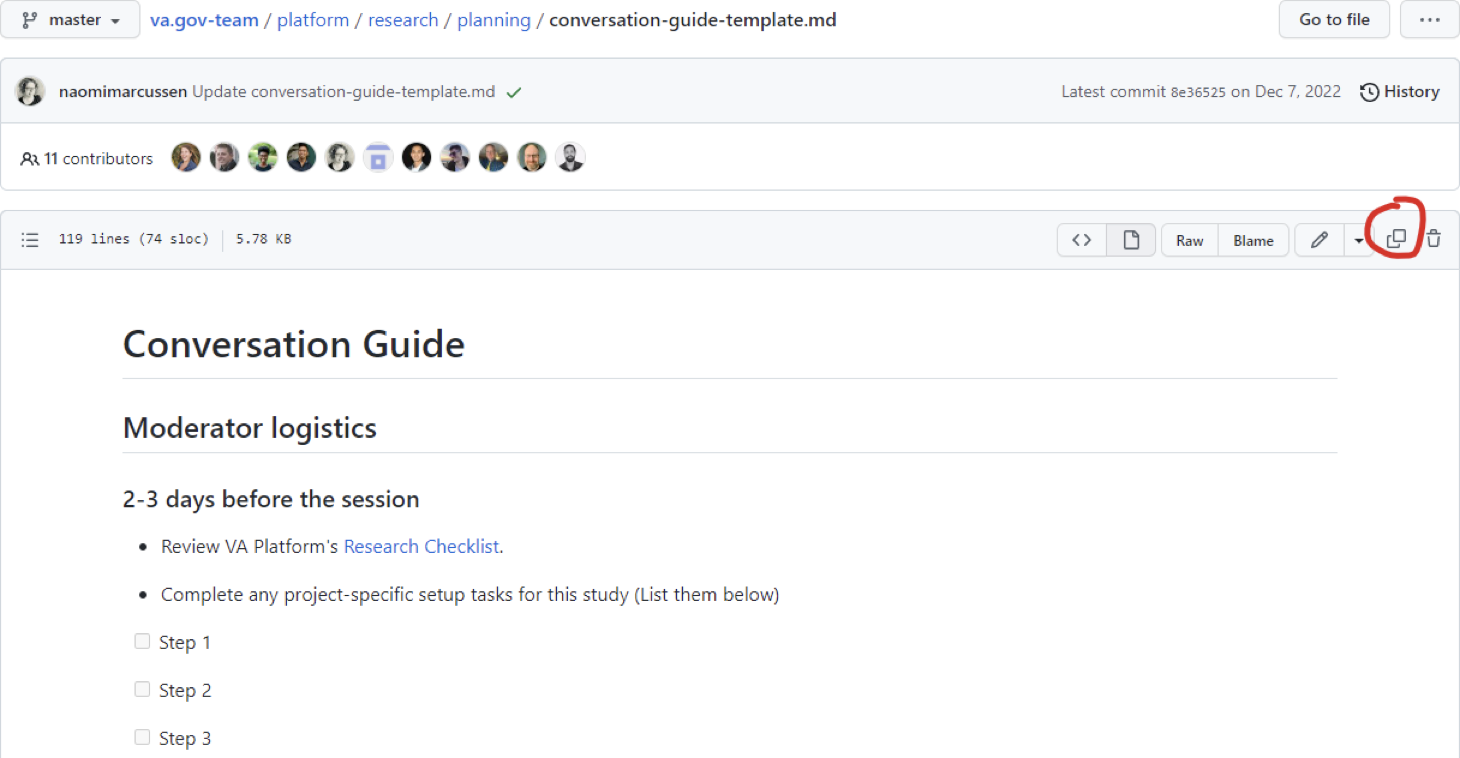
Step 2: Add text from Conversation Guide
-
In a separate tab, open your conversation guide and click the copy raw contents icon.
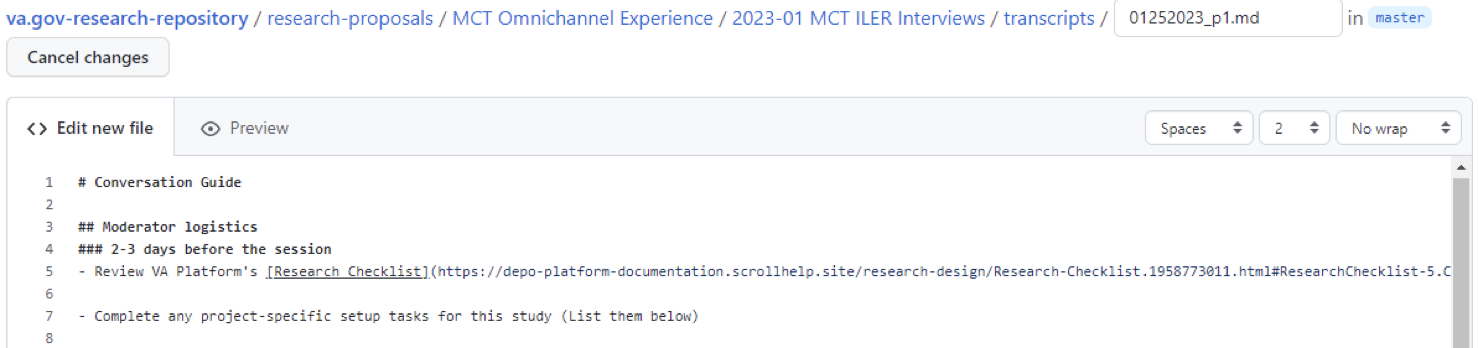
2. Then, paste it into the file you created in the transcripts folder
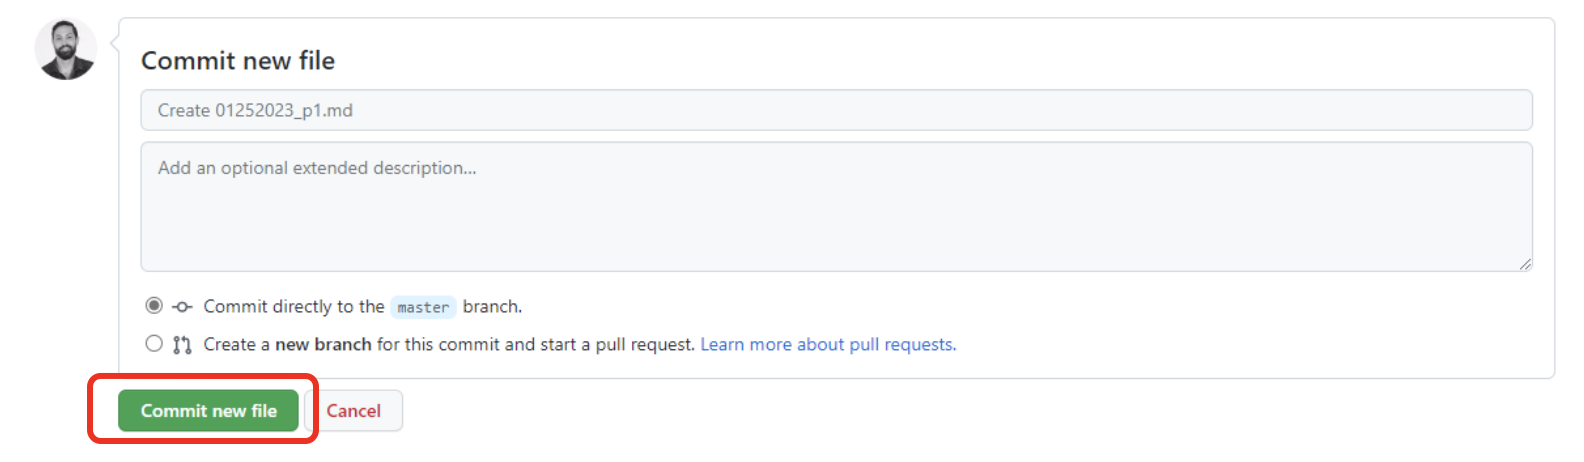
3. Click Commit new file
Step 3: Create files for all participants
Repeat steps 1 and 2 to create files for all participants, and number them accordingly. Remember to update the file name to reflect different dates if there's a no-show.
Step 4: On the day of the session
Copy that session participant file’s URL and send a Slack message to your Perigean notetaker in your study channel.
Help and feedback
-
Get help from the Platform Support Team in Slack.
-
Submit a feature idea to the Platform.