Accessing Internal Tools (via SOCKS Proxy)
NOTE: As of Socks will no longer be supported. Users must request AWS access.
This document shows you how to configure SOCKS Proxy, which is required in order to access certain tools. Follow the steps below to install SOCKS Proxy.
Some readers may prefer a video tutorial format for learning. If you prefer to watch a video instead of following the listed steps, you can watch the video tutorials at the bottom. Otherwise, follow the written steps.
What does SOCKS Proxy give me access to?
You need to configure SOCKS Proxy in order to access Jenkins, and Sentry. For more information about these tools and others, see Platform tools and the Tools Overview section in the Request access to tools document.
Prerequisites for SOCKS Proxy configuration
Before you configure SOCKS Proxy, make sure you meet these requirements.
Ensure your system is up-to-date in System Preferences or Settings.
Ensure you are signed into GitHub and you can access this Devops Github page.
If you get a 404 even after you've signed in, contact your team lead to get access. If you still need help, reach out to Infrastructure in #vfs-platform-support. You cannot proceed without this access.
Ensure you are listed on one of the rosters listed below.
If you’re on a VFS team, you need to be listed as an individual in Atlas, the VFS Team Roster, which is a list that has the names of everyone who works on a VFS team.
If you’re not listed, start the Platform Orientation so that you can be added to Atlas.
If you’re on a Platform team, you need to be listed on the Platform Roster. (<-- This Confluence link is only accessible to Platform team members.)
If you’re not listed, reach out to your team leadership about getting added to the Platform Roster.
If you’re on a Lighthouse team and not yet in Atlas, you need to be listed on the Lighthouse Roster. (<-- This Confluence link requires authentication similar to Datadog.)
If you’re not listed, reach out to your team leadership about getting added.
If you don’t have
gitconfigured on your computer, create a GitHub Personal Access token with at least "repo" scope permissions using these instructions. Create a Classic Personal Access Token, as opposed to a Fine-Grained Personal Access Token.You will use this as your GitHub password when prompted.
Note: You will only need this Personal Access Token once and for a short period of time. After you have completed the vtk socks setup you’ll no longer needed the Personal Access Token.
Now configure SOCKS Proxy using the steps below depending on which type of computer you use.
Configuring SOCKS Proxy on Mac
Open the application, “Terminal.” (On Macs, the command line is called “Terminal.”)
Within the command line, run
sudo gem install vtkand enter your system password if prompted.Run
vtk socks setupand follow the prompts.This command guides you through installing Homebrew, downloading the correct configuration, setting up your key, creating an access request, and configuring your system to access our SOCKS-secured tools.
Important: If and when the system requests your GitHub password, do not enter your GitHub password. Instead, enter your GitHub personal access token, which you made or ensured you had in Step 4 of Prerequisites for SOCKS Proxy configuration.
If you do not have a VA key, the system prompts you to create one. We recommend adding a passphrase here. The system copies the key to your clipboard for you. Upon creation, the system then opens a SOCKS Access Request issue in GitHub where you must paste your key.
Do NOT paste your Personal Access Token (which starts with ghp_) anywhere in the GitHub issue. Your PAT is like a password.

You will be prompted to a GitHub page that looks similar to this, though the exact layout may look slightly different on your screen.
In the GitHub issue where you pasted in your key in Step 4, scroll down to where it says “Access Type Requesting” and select the option that best fits your role and your needs.
Product Managers, and those involved with UX (such as UX Designers, User Researchers, and UX writers) must select “viewers.”
Developers that need SSH access to review environments, lower environment vets-api/revproxy, etc. must select "developers."
Platform CoP team members must select "platform."
If you’re still not sure which option to select, talk to your manager.
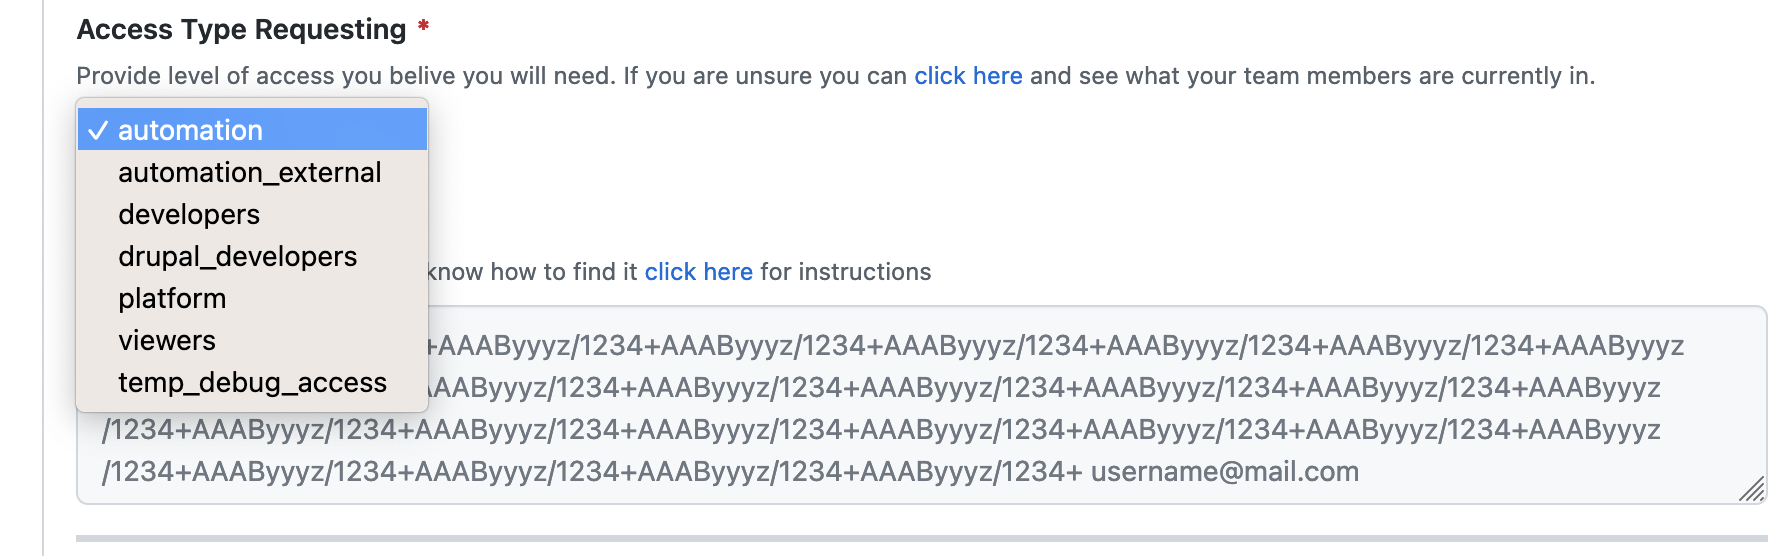
In the Access Type Requesting dropdown, select the option that best fits your role and your needs.
Fill out the rest of the GitHub issue with the information it asks for, such as your name, your email, and attach a screenshot of your E-QIP Transmittal Confirmation. Then submit the issue. (See the screenshot under Step 4.)
Wait for someone to approve your GitHub request. Once someone does that you will have SOCKS Proxy configured and can then access the tools behind it. If you’re at all unsure if you have SOCKS Proxy configured, run
vtk socks setupa second time. If you have any additional issues accessing tools and you’re using a Mac, try the steps under Troubleshooting for Mac.
Configuring SOCKS Proxy on Linux
In the Ubuntu command line, install ruby by running
sudo apt update && sudo apt install ruby.If you already have a version of ruby installed, you can skip this step.
Go to Step 2 in the above process, Configuring SOCKS Proxy on Mac, and follow the instructions starting with Step 2.
Configuring SOCKS Proxy on Windows
Enable WSL and reboot.
In Windows Search, search “features” and open “Turn Windows features on or off.”
Enable “Windows Subsystem for Linux” and click “OK.” It then asks you to reboot.
Install and open Ubuntu.
In Windows Search, search “store” and open “Microsoft Store.”
In Microsoft Store, search “Ubuntu” and click “Ubuntu 20.04 LTS.”
Click the “Install” or “Get” button.
You do not need to login if prompted. It may take a moment for the download to begin.
Once the download is finished, in Windows Search, search and open “Ubuntu.”
On first open, it asks you to create a user/password.
Install ruby by running
sudo apt update && sudo apt install ruby.If you already have a version of ruby installed, you can skip this step.
Enable ssh-agent:
$ eval "$(ssh-agent -s)"Go to Step 2 in the above process, Configuring SOCKS Proxy on Mac, and follow the instructions starting with Step 2.
IMPORTANT: Configuring SOCKS Proxy on Mac above adds the following lines to your ~/.ssh/config
Host *
  UseKeychain yes
  AddKeysToAgent yes
  IdentityFile ~/.ssh/id_rsa_vagov
these should be replaced with
Host *
  IgnoreUnknown UseKeychain
  UseKeychain yes
  AddKeysToAgent yes
  IdentityFile ~/.ssh/id_rsa_vagov
Troubleshooting for Mac
If you successfully installed SOCKS Proxy on your Mac but you still can’t access certain tools such as Sentry, try doing these additional steps:
Go to Mac OS System Settings.
Search for “proxy” and then click “Proxies.”
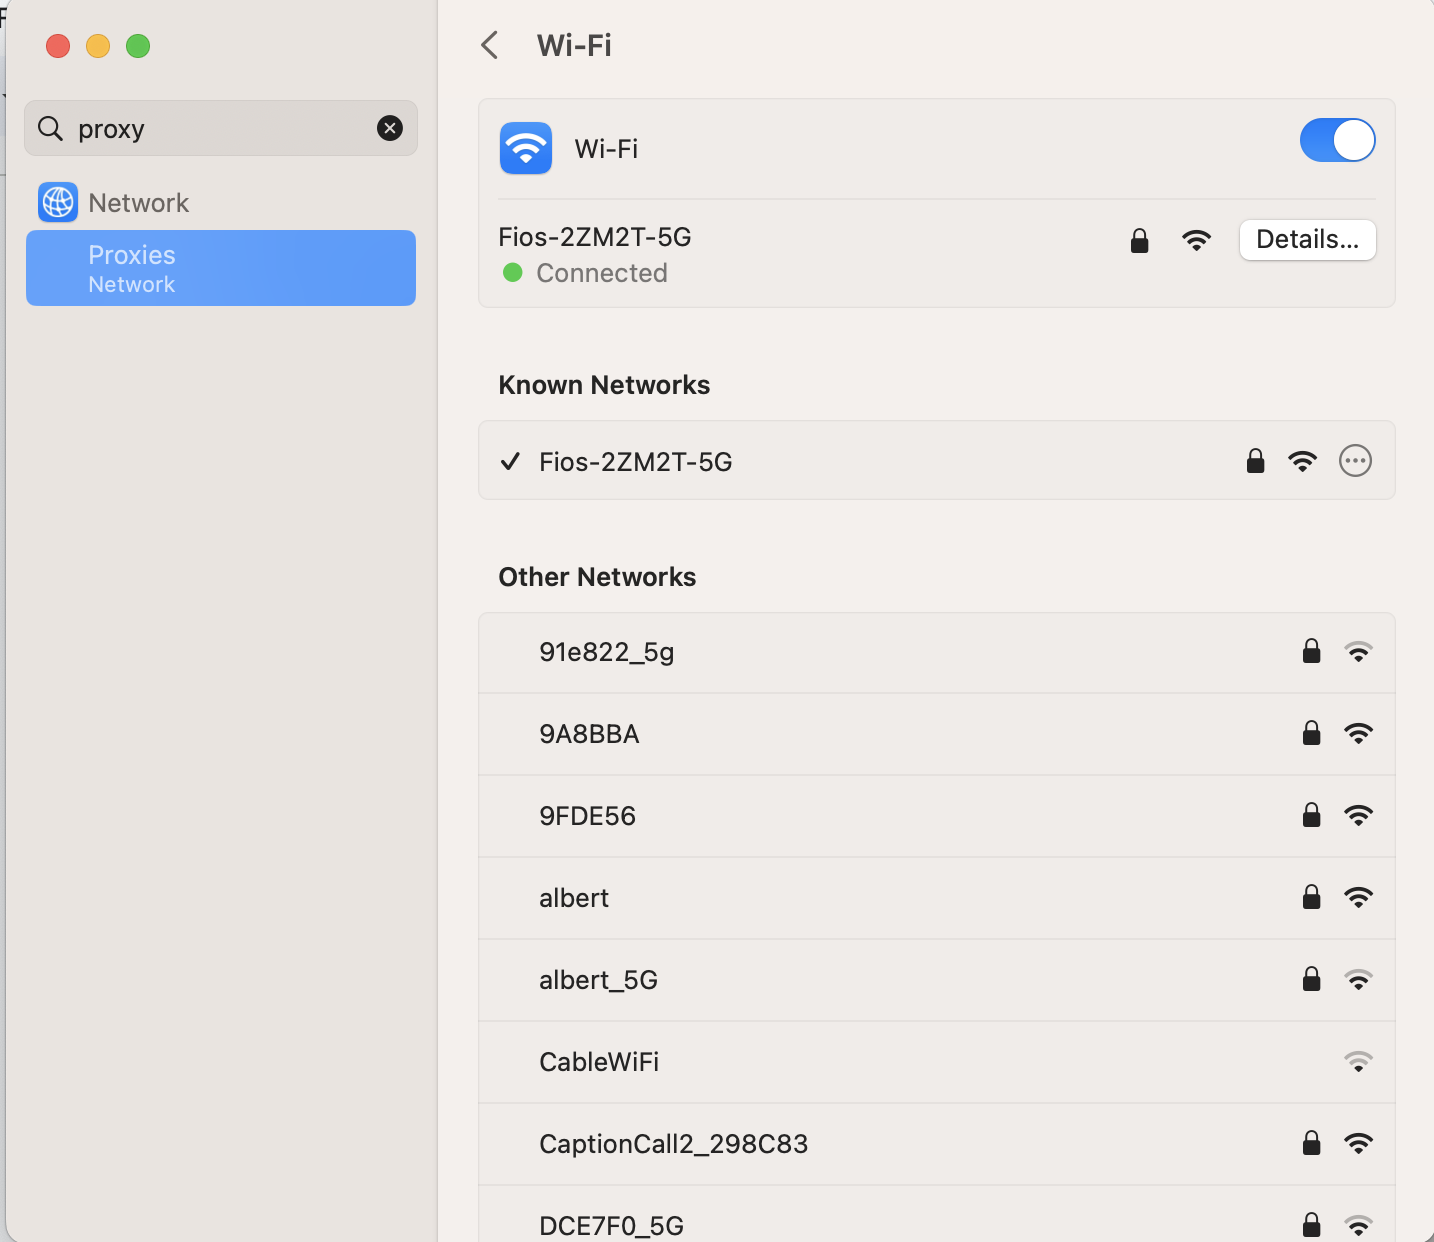
This is what the system looks like when you go into System Settings and search “proxy.”
In the pop-up that comes up, make sure that “Auto proxy discovery” is turned on. If it isn’t turned on, click the toggle to turn it on.
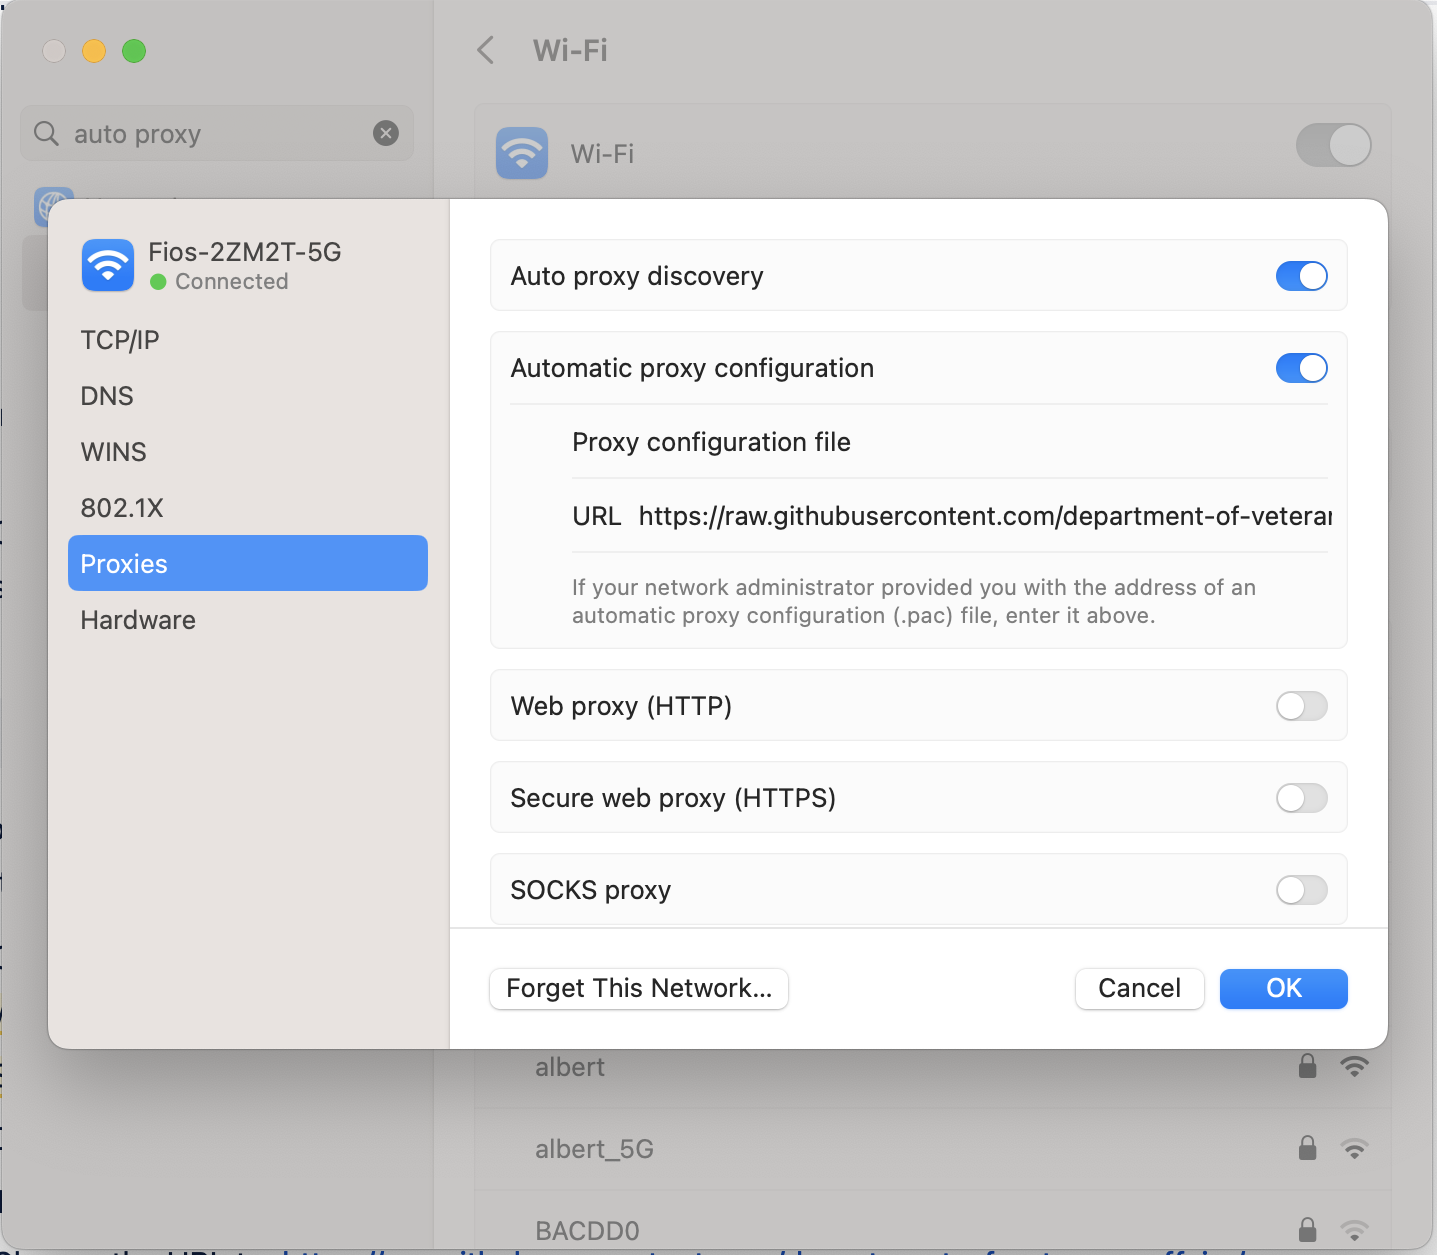
Here, you can make sure Auto proxy discovery is turned on and check the URL.
Make sure that next to “URL” it reads: https://raw.githubusercontent.com/department-of-veterans-affairs/va.gov-team/master/scripts/socks/proxy.pac. If it doesn’t show that, copy and paste that text into the window.
Click OK.
Now try accessing your tools again.
If all else fails, throw your keys in the trash and start the process over. This command can be used to move your keys to the trash: mv ~/.ssh/id_rsa_vagov* ~/.Trash
Mac Video Tutorial
Here is an optional video tutorial for how to set up SOCKS Proxy on Mac for viewers who prefer to learn this way.
Linux Video Tutorial
Here is an optional video tutorial for how to set up SOCKS Proxy on Linux for viewers who prefer to learn this way.
Windows Video Tutorial
Here is an optional video tutorial for how to set up SOCKS Proxy on Windows for viewers who prefer to learn this way.
Additional notes
If you’d like, you can also read the old instructions here.
You can also review the source code to the setup command.
Help and feedback
Get help from the Platform Support Team in Slack.
Submit a feature idea to the Platform.