

Check out the Adding a new feature doc to make sure you're trying to add the right type of feature to VA.gov.
Last Updated:
This document provides information about the application generator and the manual app creation process.
Yeoman generator
The easiest way to create a new application is with the Yeoman application generator. You can use the walkthrough to create your own regular or form application. The manual set up process is below, which you can read through to get a better understanding of the different pieces that are needed.
Important: When you are creating a new application with the Yeoman application generator, make sure you update revproxy config to reflect the addition of your application so that internal links created via react-router will work properly.
Manual set up
Here are the steps for manually setting up a new application. We're going to walk through setting up an application called "my new application."
-
In vets-website, create a new folder for your application in
src/applications/. In our case, we're usingmy-new-application: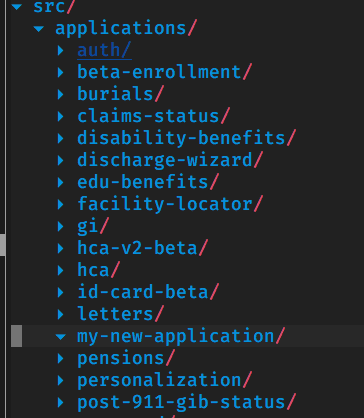
Folder tree with new application folder added
-
Add a manifest.json file in the new folder. This file contains important information about your application:
JSON{ // Name of your application, not Veteran facing "appName": "My new application", // The Webpack entry point to the bundle for your application "entryFile": "./my-new-application-entry.jsx", // The Webpack bundle name for your app. Must be unique. "entryName": "my-new-application", // The root url where your application lives // This one is only used by webpack-dev-server for local development "rootUrl": "/my-new-application", }
-
Add an entry to
src/applications/registry.jsonin thecontent-buildrepo. This file contains information that the content build needs to create the landing page for your application:JSON{ // Name of your application, not Veteran facing "appName": "My new application", // The Webpack bundle name for your app. Must be unique. "entryName": "my-new-application", // The root url where your application lives "rootUrl": "/my-new-application", // Properties specific to rendering your application's HTML landing page "template": { // Document title "title": "My new application", // Standard Metalsmith Liquid template for React applications "layout": "page-react.html", // <meta name="description"> "description": "A new application!", // <meta name="keywords"> "keywords": "not required, but good practice for public apps", // A feature toggle, indicating that this application is excluded from production builds "vagovprod" false } }
Note: If you don't want to add your application to the application registry, but still want your application's tests to run in CI, you'll need to add an entry to src/applications/registry.scaffold.json instead.
-
Add your new application
entryNameto the vets-api source app middleware configuration so it will be recognized and the source_app tag will be usable in Datadog. -
Create the file you referenced in the
entryFileproperty above:React JSXimport 'platform/polyfills'; import './sass/my-new-application.scss'; import startApp from 'platform/startup'; import routes from './routes'; import reducer from './reducers'; import manifest from './manifest'; startApp({ url: manifest.rootUrl, reducer, routes, entryName: manifest.entryName, });
The file above uses our startApp helper to create a React/Redux app that has client-side routes handled with react-router. You can leave out the routes or reducer if you don't need Redux or react-router. There's also a reference to a Sass file, which will set up the styles for your application.
-
Update revproxy config to reflect the addition of your application so that internal links created via
react-routerwill work properly. -
Create Sass file (
src/applications/my-new-application/sass/my-new-application.scss):CSS@import "~@department-of-veterans-affairs/formation/sass/shared-variables"; // Your custom scss -
Create reducer (
src/applications/my-new-application/reducers/index.js):JavaScriptconst initialState = { // whatever initial state you have }; function myNewApplication(state = initialState, action) { switch (action.type) { case SOME_ACTION: return state; default: return state; } } export default { myNewApplication };This is a normal Redux reducer, and can be broken up into different state slices as needed. The only thing to note is that it needs to return an object, not a function. This object will get merged with other state data and then turned into a function using Redux's
combineReducersfunction. -
Create routes file (
src/applications/my-new-application/routes.jsx):React JSXimport React from 'react'; import { Route, IndexRedirect } from 'react-router'; import MyPage from './containers/MyPage.jsx'; import MyNewApplicationApp from './containers/MyNewApplicationApp.jsx'; const routes = ( <Route path="/" component={MyNewApplicationApp}> <Route component={MyPage} path="my-page"></Route> <IndexRedirect to="my-page" /> </Route> ); export default routes;You can add new pages and whatever routed components you need in this file. And that's it! If you fill out the routes.jsx file with pages that exist, you should be able to start up VA.gov and see it working locally.
PR merge order
vets-website and then content-build. Whether you use the Yeoman generator or create your application manually, the first thing you'll need to do is get your PR to vets-website approved, merged, and post-merge CI on main needs to complete so that the build assets are available for content-build to pull down. Automated tests should then pass for the registry addition in your content-build PR.
Going to production
The above steps will only enable your application in our staging and dev environments. In order to enable it in production, you'll have to remove the feature toggle added into your application's entry in the registry.json.
{
  "appName": "My new application",
  "entryName": "my-new-application",
  "rootUrl": "/my-new-application",
  "template": {
    "title": "My new application",
    "layout": "page-react.html",
    "description": "A new application!",
    "keywords": "not required, but good practice for public apps",

    // ALLOW THIS TO SHIP TO PRODUCTION BY SETTING THIS TO TRUE
    "vagovprod" false
  }
}
Help and feedback
-
Get help from the Platform Support Team in Slack.
-
Submit a feature idea to the Platform.