

Last Updated:
This document elaborates on the standard practices for preforming a manual deploy on vets-website and content-build repositories.
Out-of-band deploys may be performed in accordance with Platform deployment policy.
Manual deployment - vets-website
Before deploying
-
Wait for GitHub Actions to build the change in
vets-website -
Builds status can be viewed here
-
If this build fails, you may need to re-run the workflow by clicking on the failed workflow and selecting “Re-run jobs → Re-run all jobs”
Full production deploy of vets-website
-
Verify that your changes are committed and that the changes since the last deploy are safe to deploy:
-
Start a deploy job
-
Visit the vets-website Daily Production Deploy workflow
-
At the top of the previous workflow runs, click Run workflow
-
Verify Use workflow from is set to Branch: main
-
Verify the Minutes to wait before creating release option is set to 5 minutes
-
Click Run workflow
-
Once the workflow is complete, you will be prompted to approve the deploy( similar to commenting and approving during a code review). You will only be able to do this is you have admin privileges to the
vets-websiterepo. If you do not have privileges reach out in #platform-cop-frontend for assistance to completing the deploy process.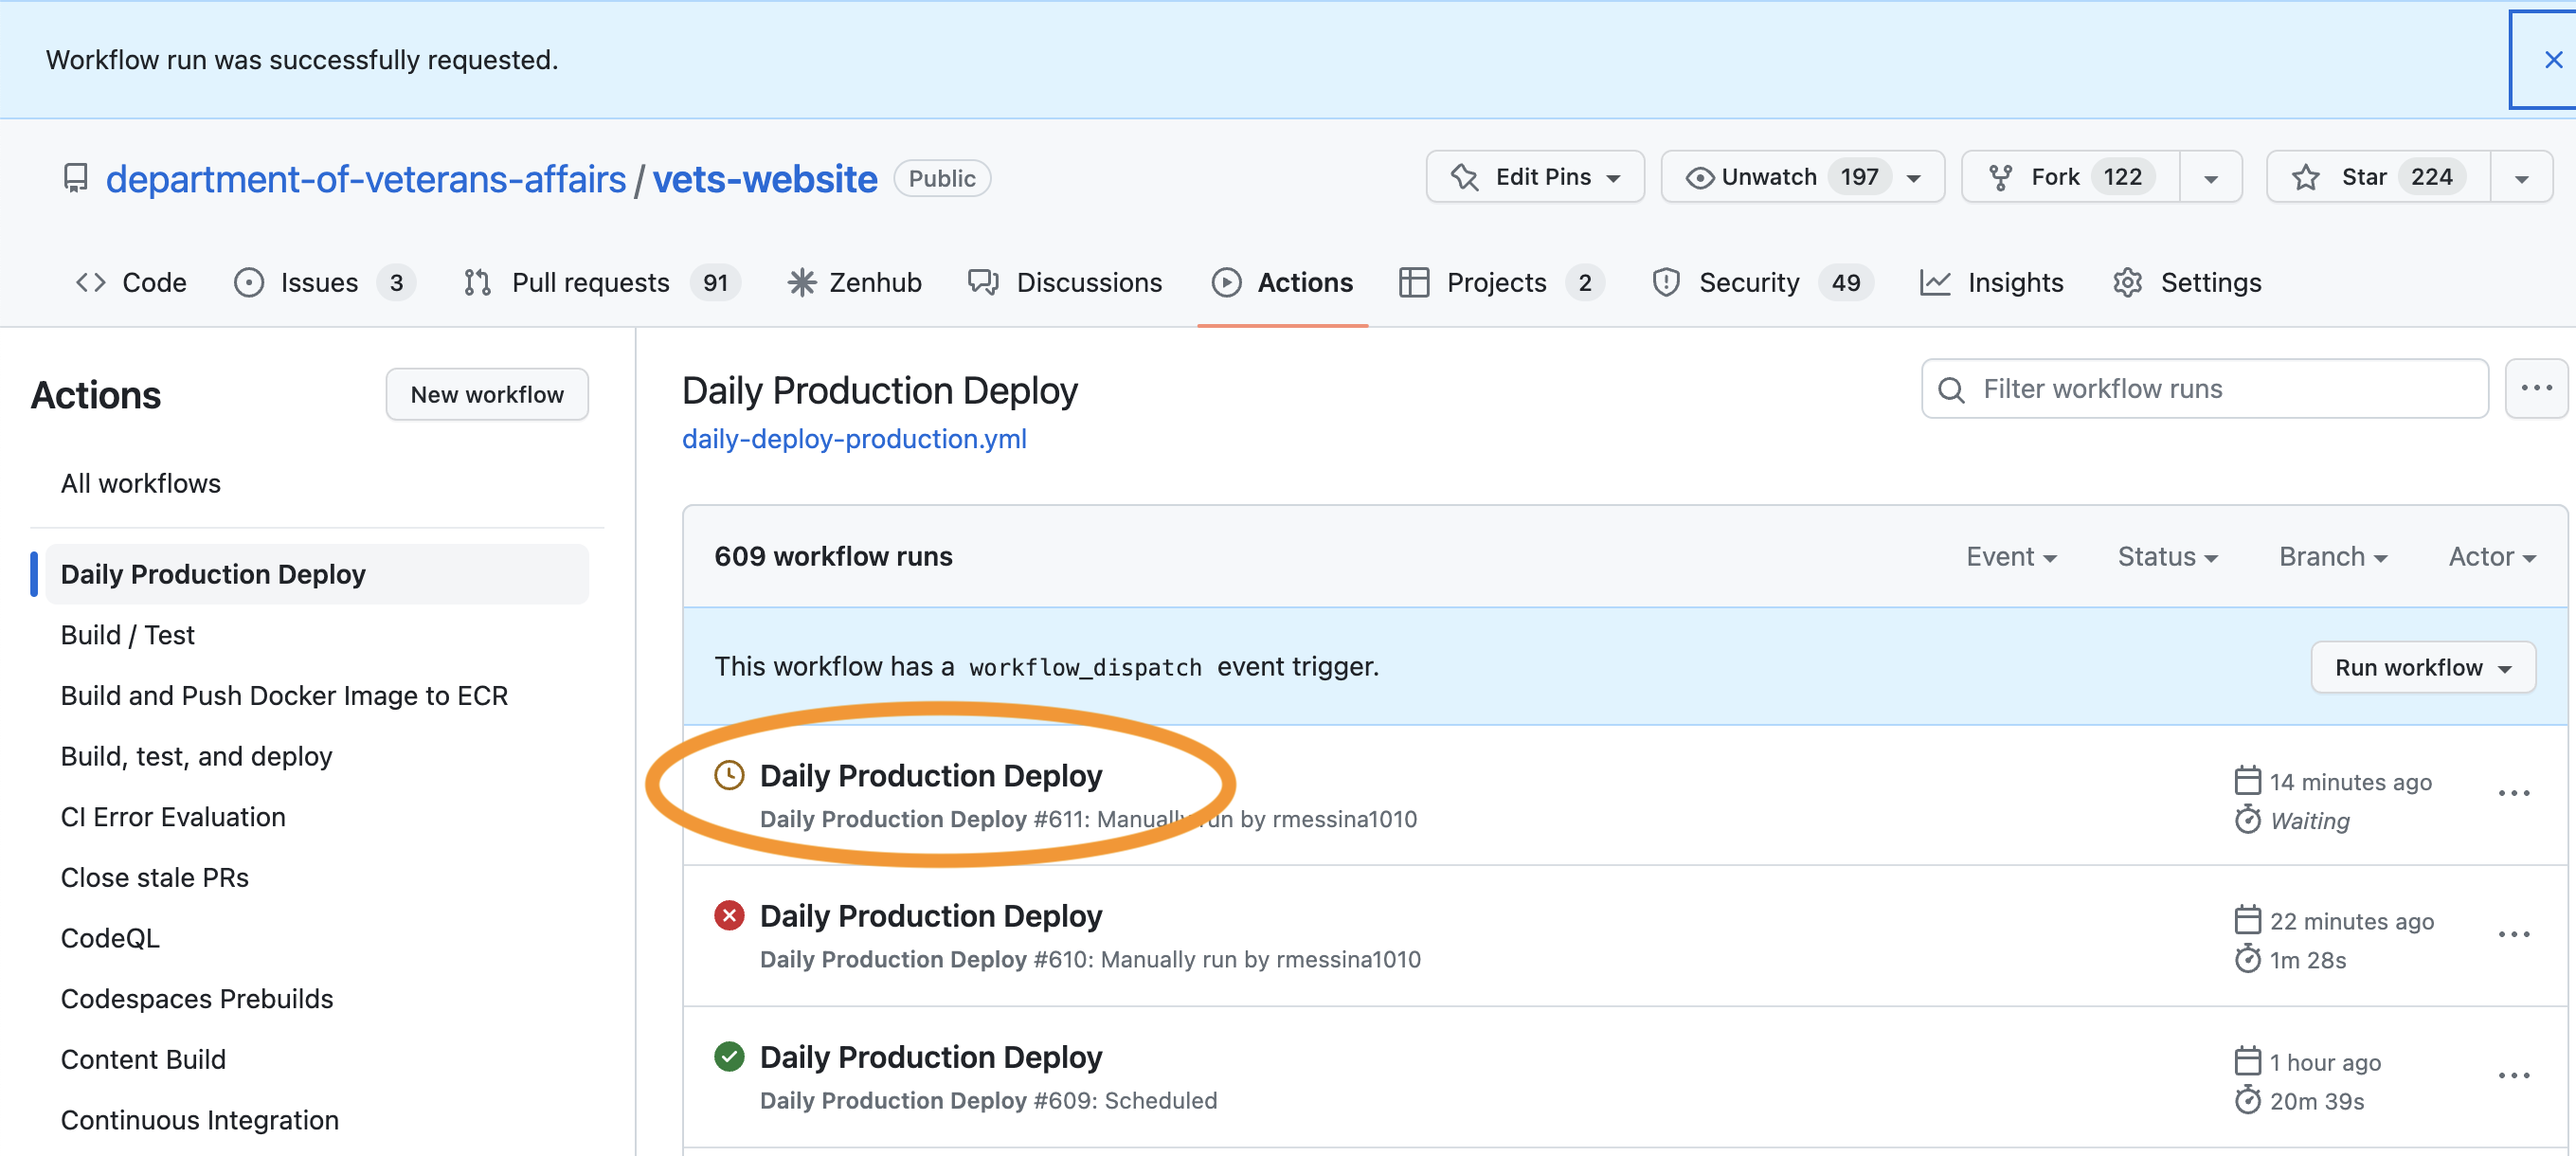
Daily production deploy CI competed label

Review deployments button

Production (target env) checkbox
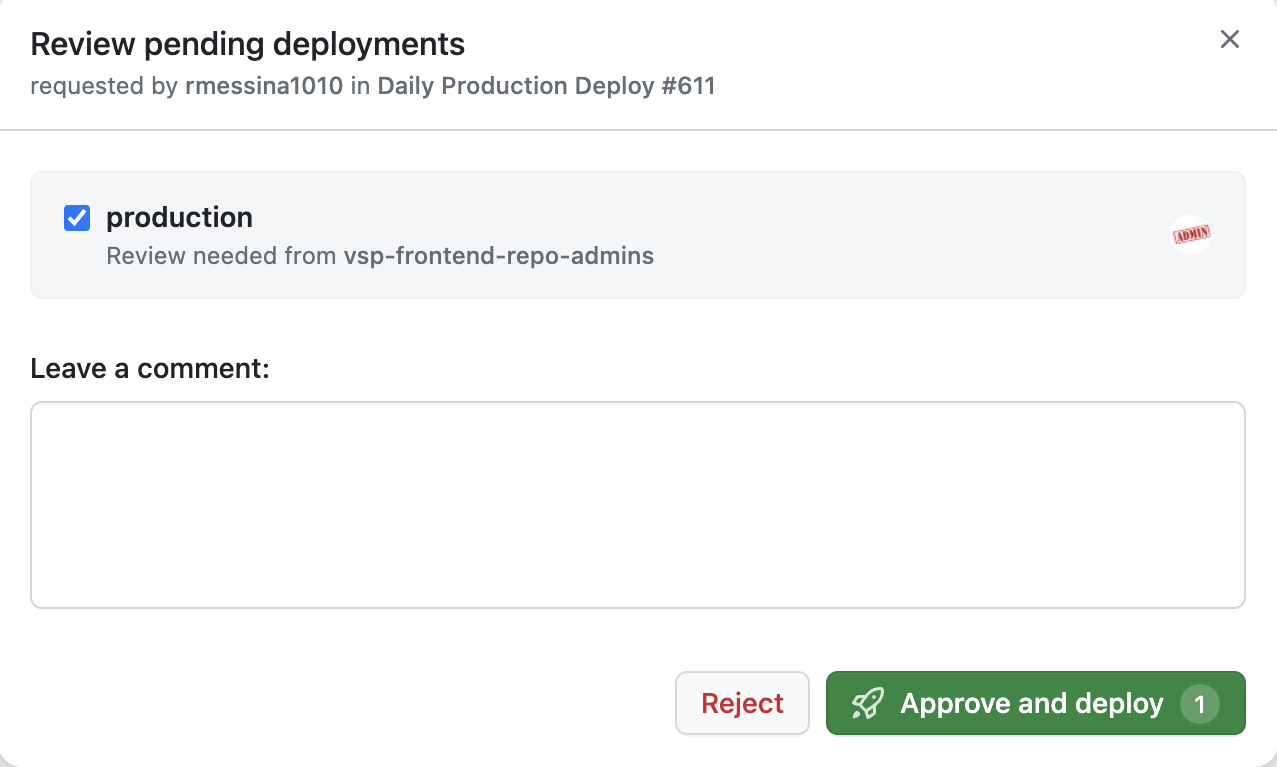
Production (target env) checkbox checked, approve and deploy ready -
Verify commits in deployment notification
Note: In the #status-vets-website Slack channel, GitHub Actions will include a link that shows the exact commits being released in the deploy notification.
-
-
Verify changes in production once the build finishes
Manual deployment of vets-website to staging or dev
When staging deployments get clogged up or staging as a whole falls behind production (for various reasons) you may need to execute a manual deployment for staging. To do this use the following steps:
-
Make sure the commit you want to use has passed through the build pipeline in main
-
Copy the commit ref by clicking the Copy icon in the same row of the commit you want to use
-
Visit the vets-website Manual dev/staging Deploy workflow
-
At the top of the previous workflow runs, click Run workflow
-
Verify Use workflow from is set to Branch: main
-
Paste the previously copied ref value into the Deploy a specific commit field
-
Select one of the following values in The environment to deploy to
-
Click Run Workflow
-
You can watch the deployment process by clicking on your triggered workflow on the vets-website Manual dev/staging Deploy workflow page in GitHub
Manual deployment - content-build
Multiple manual deploys are supported via GitHub Actions:
-
Partial deploy including only static page changes (
vagov-contentandDrupal) -
Full deploy of VA.gov static pages
Content-only production deploy
-
Start a deploy job
-
Visit the content-build Content Release workflow
-
At the top of the previous workflow runs, click Run workflow
-
Verify Use workflow from is set to Branch: main
-
Verify the Minutes to wait before creating release option is set to 5 minutes
-
Verify the The environment to deploy content to option is set to prod
-
Click Run workflow
-
Verify commits in deployment notification
Note: In the #status-content-build Slack channel, GitHub Actions will include a link that shows the exact commits being released in the deploy notification.
-
Full production deploy of content-build
-
Verify that your changes are committed and that the changes since the last deploy are safe to deploy:
-
Start a deploy job
-
Visit the content-build Daily Production Release workflow
-
At the top of the previous workflow runs, click Run workflow
-
Verify Use workflow from is set to Branch: main
-
Verify the Minutes to wait before creating release option is set to 5 minutes
-
Click Run workflow
-
Verify commits in deployment notification
-
Manual deployment of content-build to staging or dev
When staging deployments get clogged up or staging as a whole falls behind production (for various reasons) you may need to execute a manual deployment for staging. To do this use the following steps:
-
Make sure the commit you want to use has passed through the build pipeline in main
-
Copy the commit ref by clicking the Copy icon in the same row of the commit you want to use
-
Visit the content-build Manual dev/staging Deploy workflow
-
At the top of the previous workflow runs, click Run workflow
-
Verify Use workflow from is set to Branch: main
-
Paste the previously copied ref value into the Deploy a specific commit field
-
Select one of the following values in The environment to deploy to
-
Click Run Workflow
-
You can watch the deployment process by clicking on your triggered workflow on the content-build Manual dev/staging Deploy workflow page in GitHub
Help and feedback
-
Get help from the Platform Support Team in Slack.
-
Submit a feature idea to the Platform.